Deconstruct my wearable gear(10/28/23 Sat)

Others will want to know, but this was Erik's main question. We did a fast unpack of some gear before he had to rush off. But I wasn't able to capture these photos like I wanted to. Breaking up this long post into three parts: "wearable", "always on bike", and "when touring" for better sizing of photos and lists.
I backpacked for years, then canoed, and eventually started adventure touring. What I pack is evolving and reflects my use case. Gear improves over time, but not as much as marketing would have you believe. I upgrade for better quality, task suitability, and size. Sometimes only to find the marketing hype falls short, and for my use what I had was better. Everything here fits my use, your gear should be tailored to fit your use case.
I'm going to attempt a full breakdown of gear and where it's stored. Including my riding gear pockets and under seat storage. I'll start there because the side cases are added for touring, but the clothing, under steat and top case are always with the bike. Even the cargo net and rain gear on top of the seat are ever present.
I'm cheap, so almost nothing was purchased at full list prices. Clearly I'm no fasion template, and love outdated styles at more affordable prices. I have no product support and have payed open market prices for everything shown. With the one exception of the unexpected free green coffee beans from Coffee Corral. I'm also not counting the SWAG: MotoRad coozy, or various reusable bags with advertising.
Note that I will use left and right in relation to my position inside the gear. A front photo of a jacket will be mirrored, so my left will be on the right side of the photo. I am left handed. Besides making me cool, it dictages the convenient side for some items. Higher and lower likewise are related to my normal orientation, where the sky is up and ground is down. Don't assume I'm stunt riding during these descriptions, or ever.
Helmet, pants, heated liner
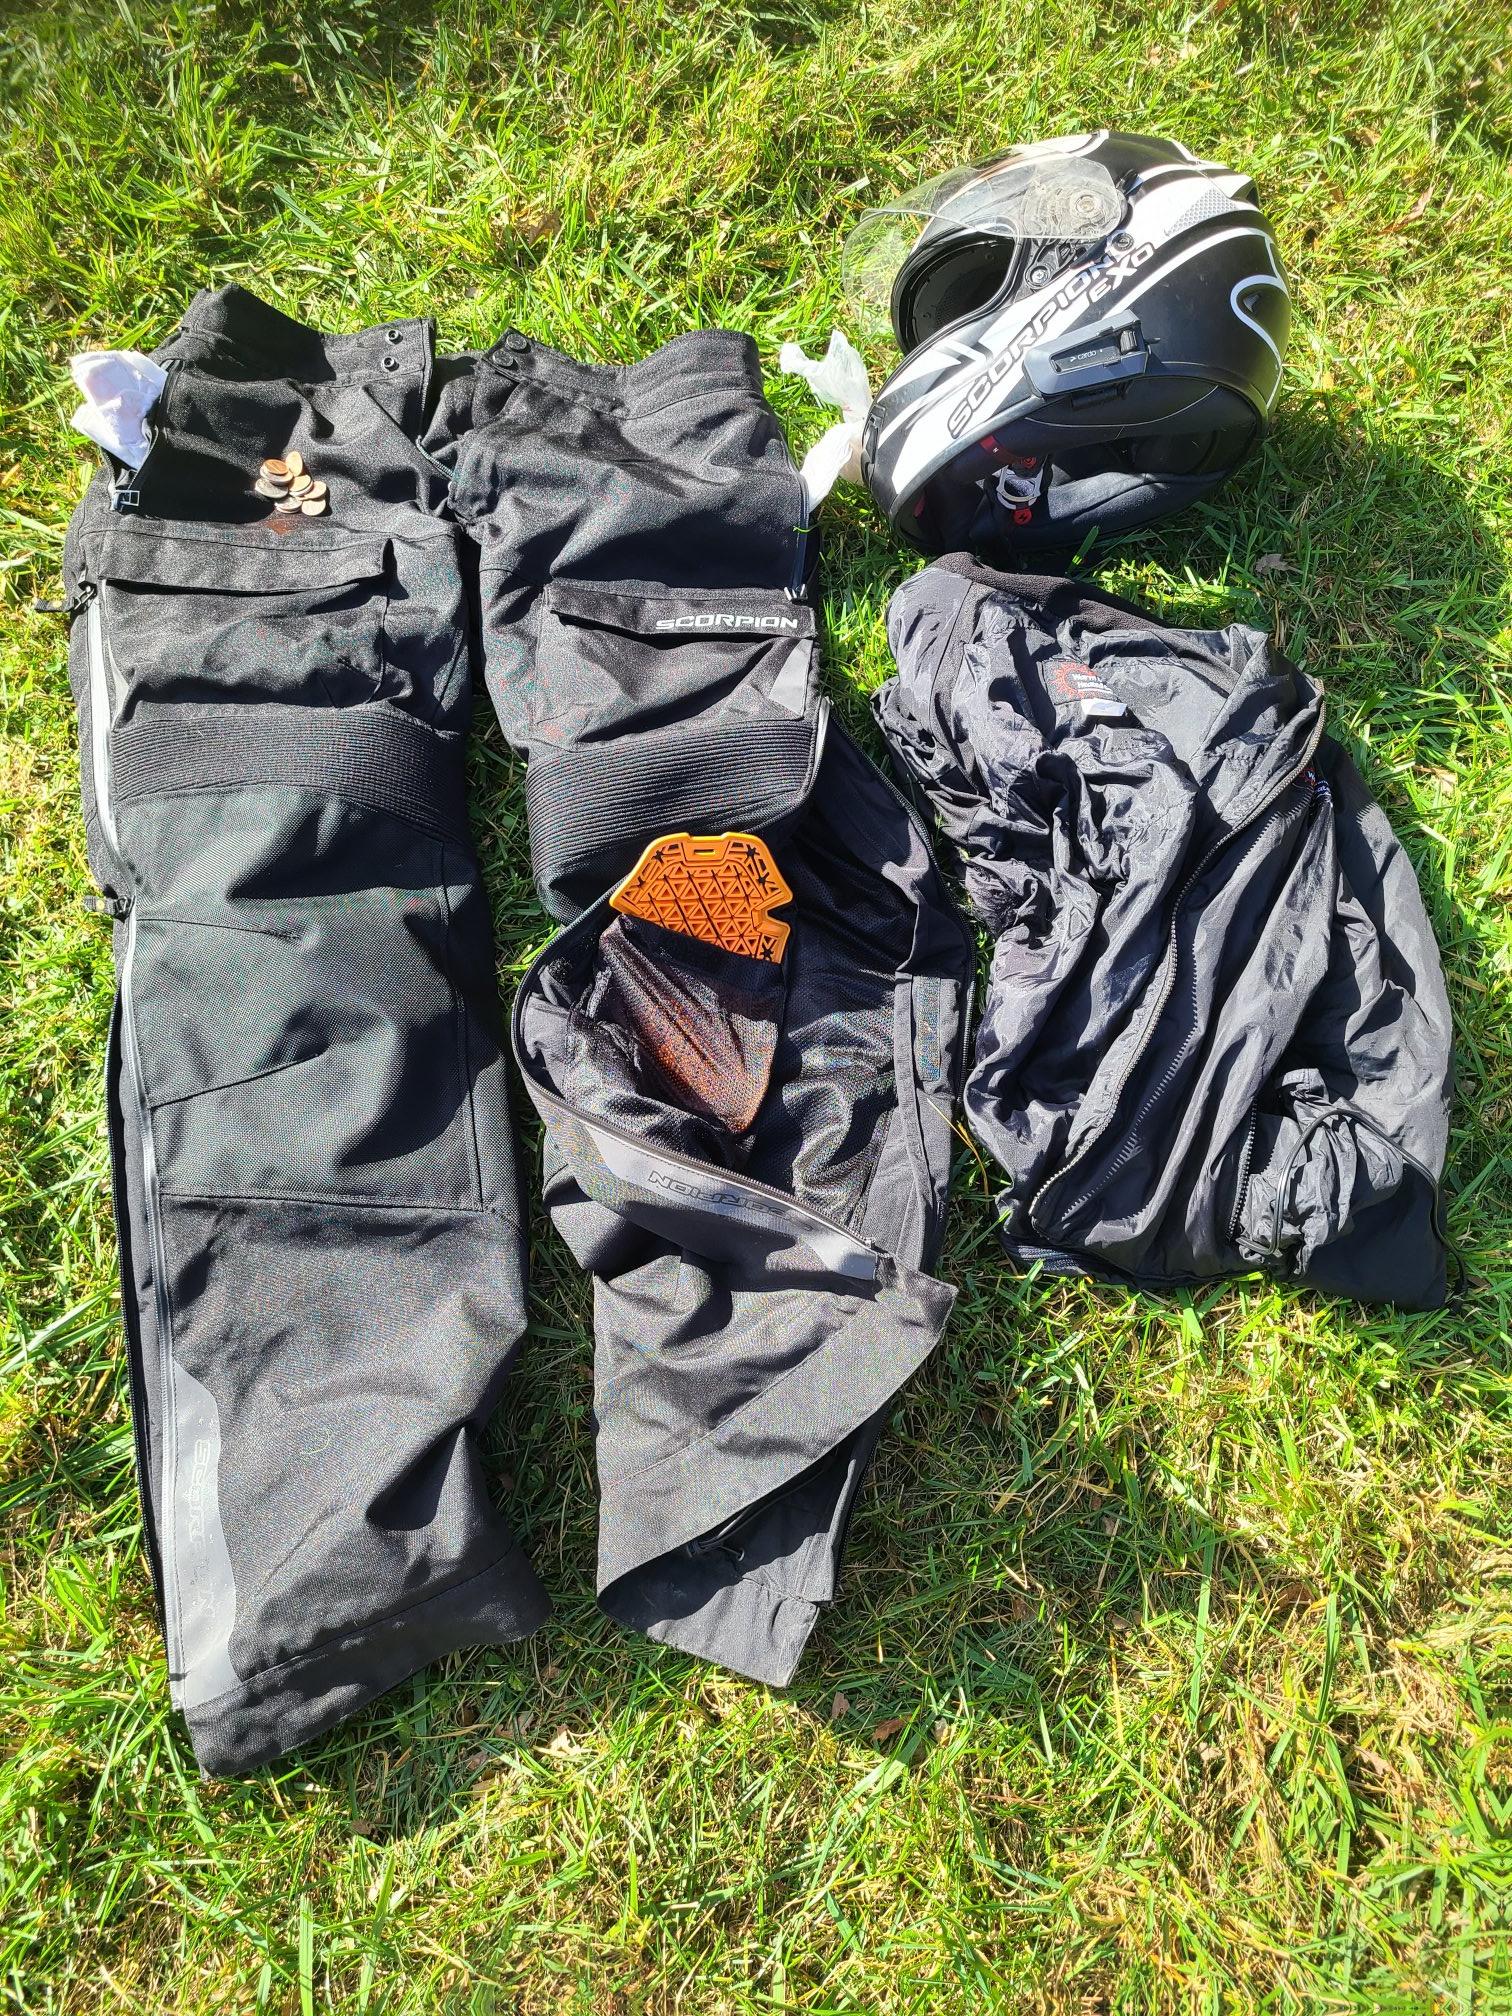
- Scorpion T1200 helmet and Cardo Edge BT comm gear.
- Scorpion Seatle pants with 3do level 2 upgraded armor (pockets: change, napkins, plastic bag)
- Warm and Safe heated liner (maybe 2008 vintage)
I've liked Scorpion Helmets for many years and a few years ago purchased their jacket and pants. I hated the fit of my first jacket and pants, the level 2 armor was very thick and very inflexable in cool weather. I prefer the fit of First Gear riding gear, and have used more of their gear. But I do own a Olympia convertable jacket and pants that I used for some warm weather rides this year. When I had an accident in 2021 I was happy to we wearing the Scorpion level 2 armor. The jacket survived unharmed but a T-post ripped the pants. I replaced the ripped pants with First Gear Kilimajaro pants, which I liked but lost someplace in New Mexico on this last trip in october. I replaced the lost pants in Texas at MotorcycleGear.com with new Scorpion Seatle pants, and upgraded 3do armor. These second Scorpion pants have a far better fit, than their initial products did.
I don't put much in my pant pockets. Change from purchases, which can certainly add up in Canada with $2 coins. I collect napkins when I can. Napkins live in my right pocket or the right thigh cargo pant pocket. Handy when chain cleaning, camping, cooking, runny nose, wet gear or incase spill cleanup, or even emergency TP. Napkins stored in my riding pants are mostly used for chain cleaning.
The plastic bag in riding pant pockets is to put over you each boot to cleanly slide through the legs of rain gear. Cleanly is used in both respects. It's smoothes out any catch points to slide boots through pant legs snag free. It also keeps any boot grime or wetness from the inside of the rain paints. If the rain gear had decent pockets I would keep this bag their. I've used the bag to store the rain gear, but it doesn't last very long when used as a container. Container bags on adventure motorcyles get a lot of abrasion rashes, so plastic just doesn't hold up as well. I really wish it did, because clear ziplock bags are great for gear storage.
Jacket (front)
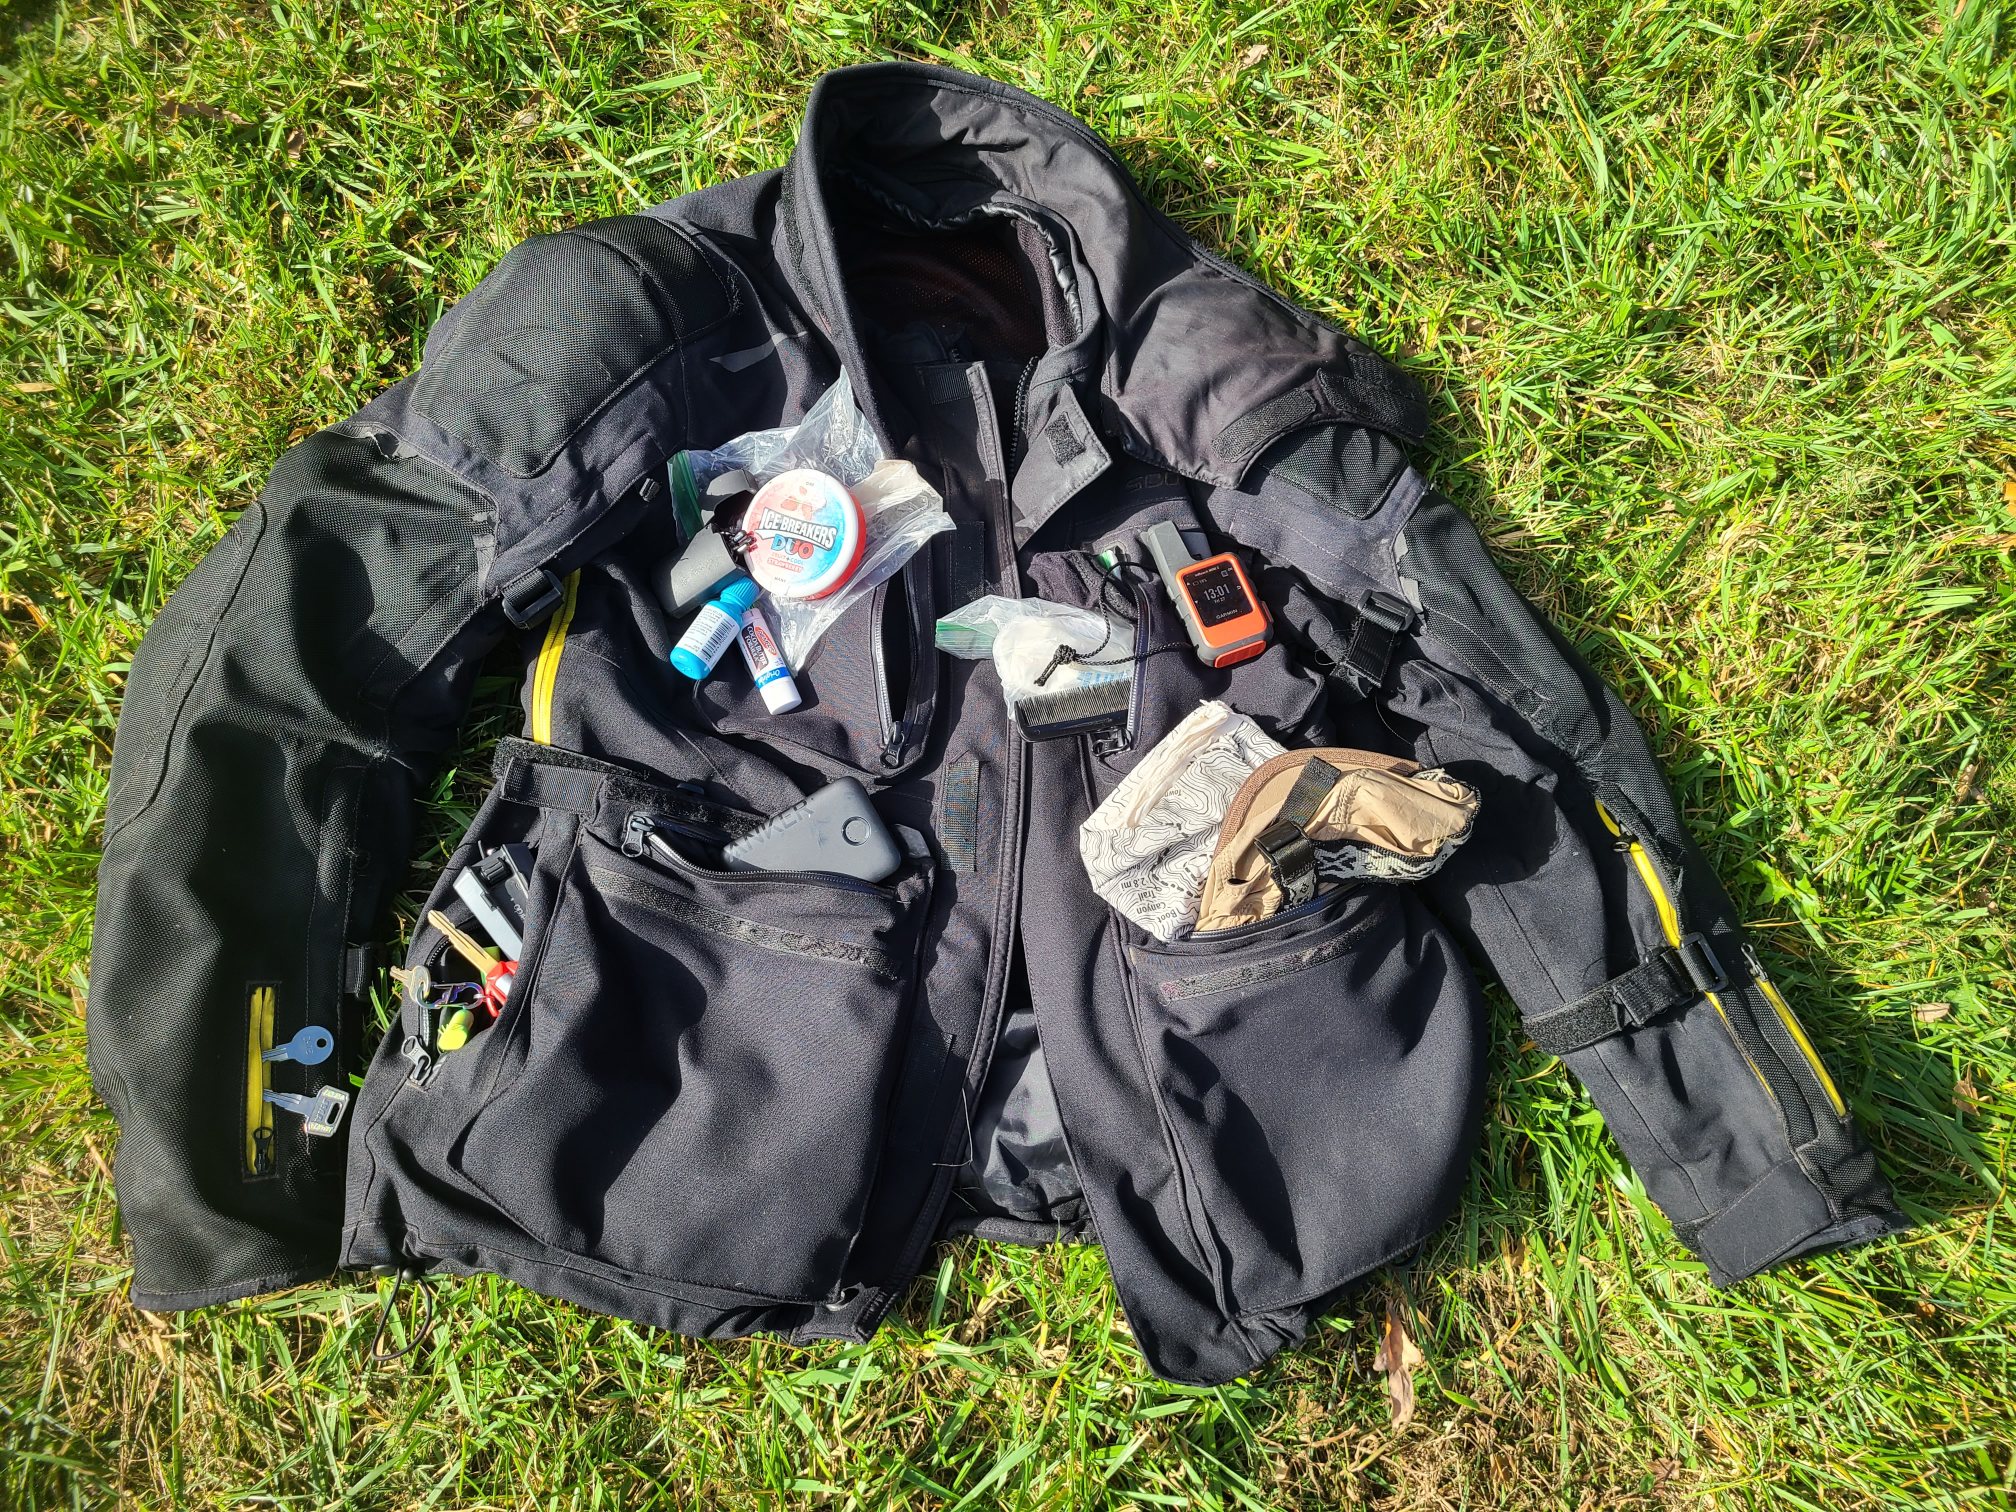
- Scorpion jacket (2020 vintage?)
- lower left side pocket (Lumintop Tool AA flashlight on paracord necklace)
- lower right side pocket (keys, ear plugs, cardo)
- lower left top pocket (ballcap/gps, bandana)
- lower right top pocket (smart phone, magsafe battery pack)
- upper left chest pocket (inReach Mini2, comb, tissues)
- upper right chest pocket (mints, folding glasses, lip balm, eye drops)
- right sleave (spare bike and box keys)
- left inside wallet pocket (wallet)
- left inside upper zipped pocket (sae usb charger, usb cable(s))
Jacket items are almost always with me when touring. It's my pocketbook. I leave my cases locked so when stopped, I can quickly walk away from a secured bike. The (not pictured) flashlight on a paracord loop is really handy when arriving after dark. It goes around my neck, and my bike keys stored their until morning. The paracord is easy to remove and has been used to cary camp firewood, tie something onto the bike, or to replace a broken pant waist belt.
For longer hikes I might leave the jacket, just remove the key, phone, and wallet. Yes I would hate to have the jacket walk away with my keyboard, gps, inReach and battery pack. But all of it is left behind out of sight. If someone really wants to steal stuff, the cases could broken into with a large screwdriver in a few seconds. Security is all relative to opportunity.
Jacket (back) rabbit pouch pocket
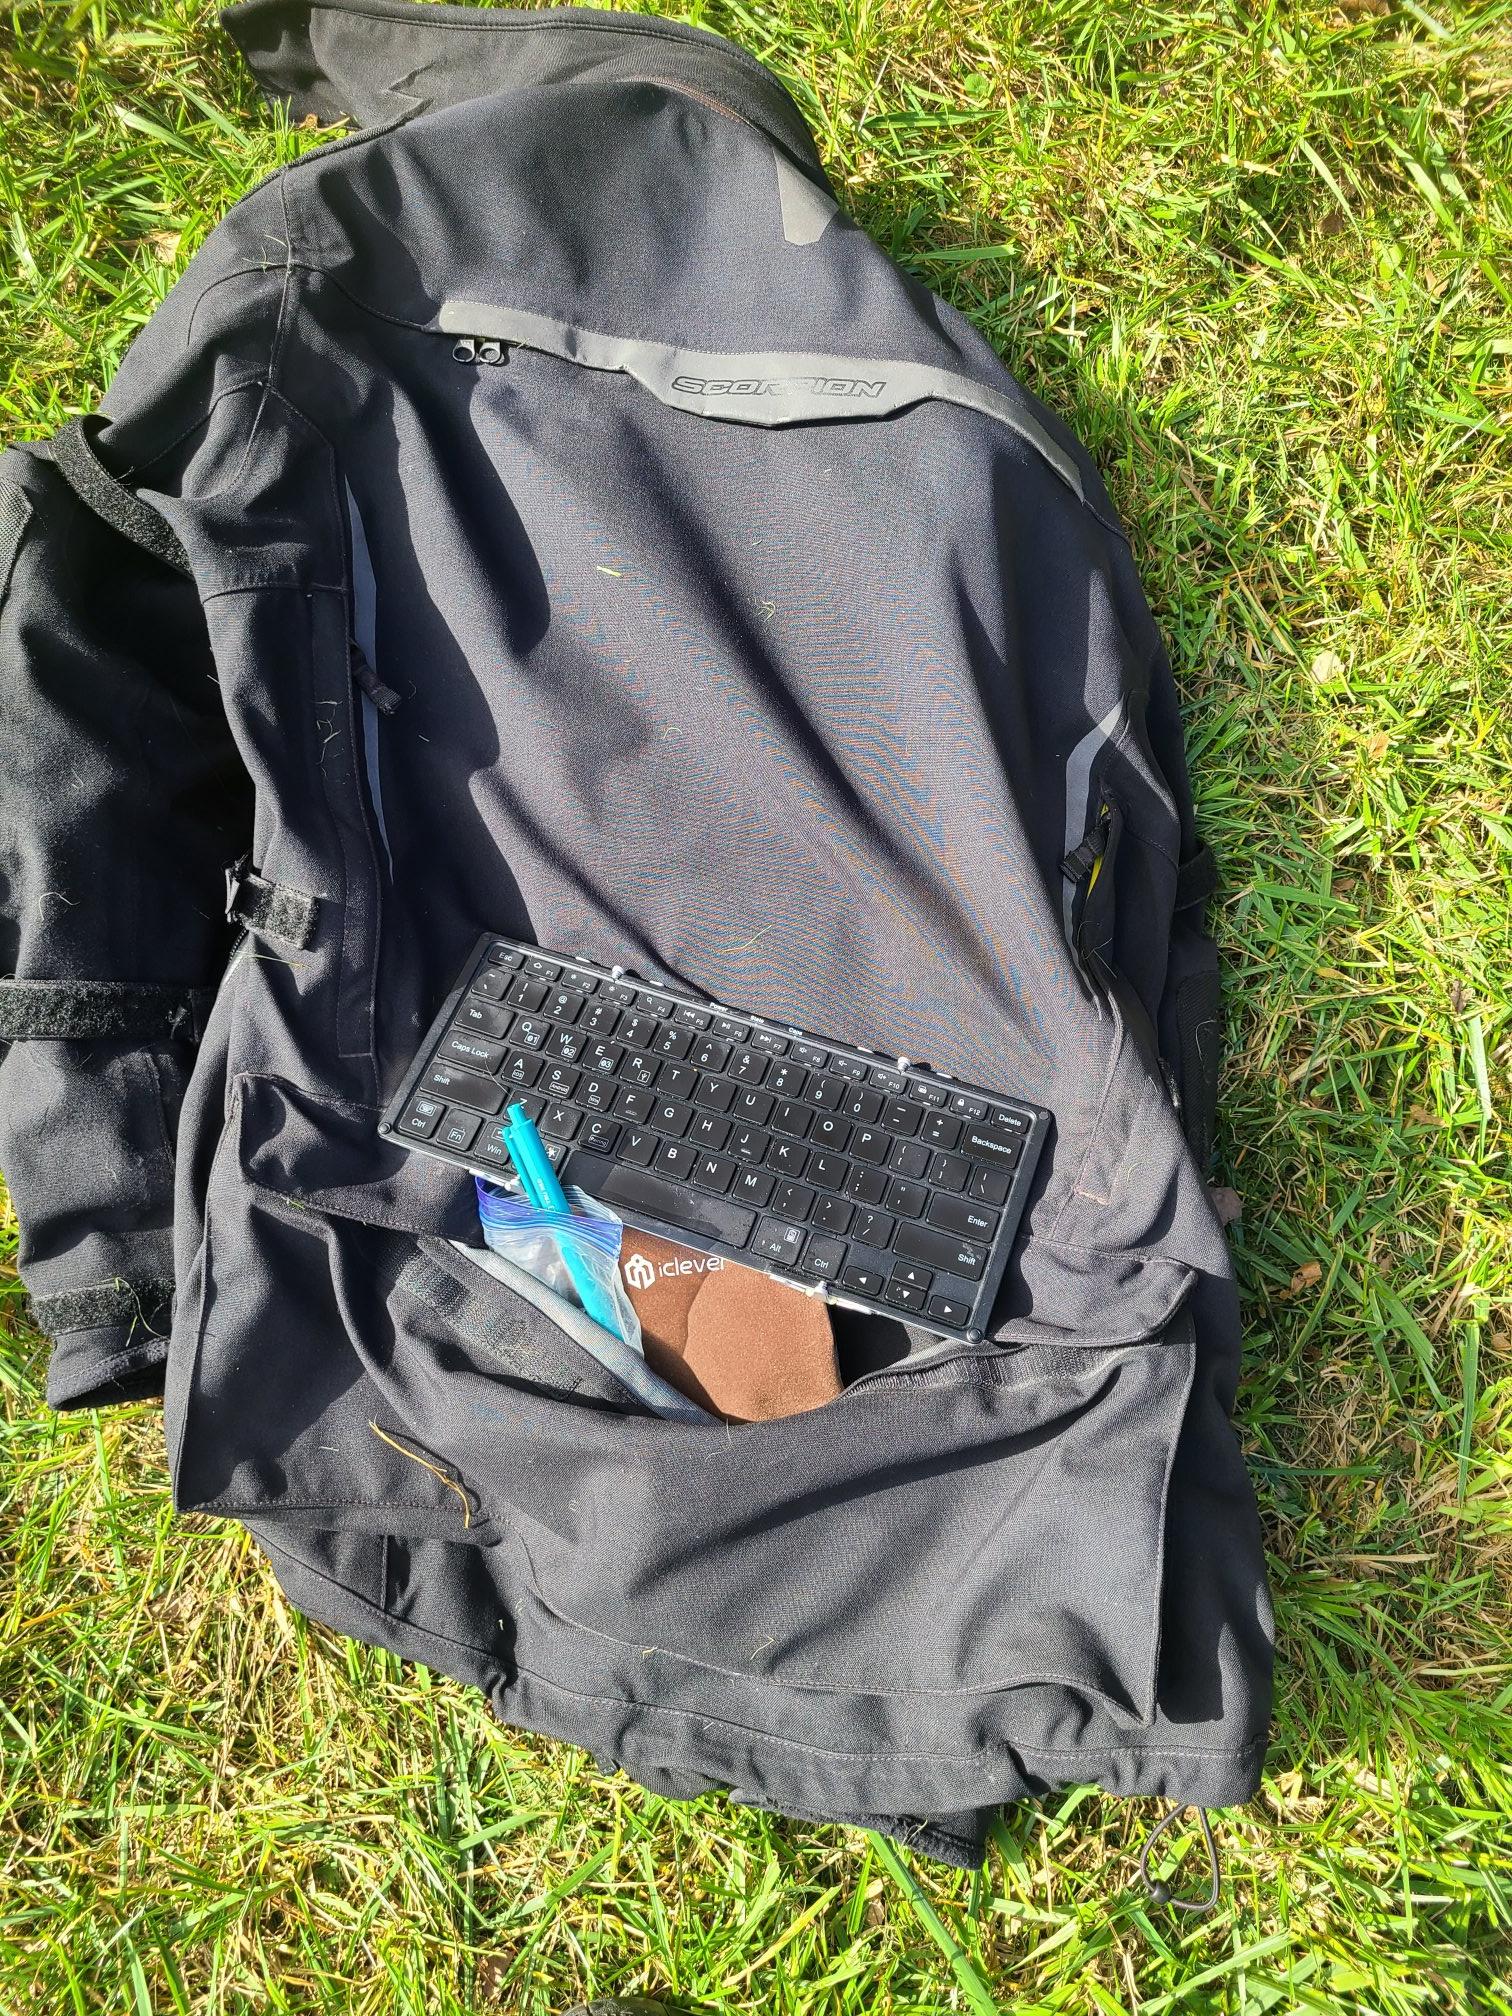
- folding keyboard
- pen
- jacket zip off neck
- (sometimes) ball cap
Lunch stop sequence
- Stop in 1st gear and put down kickstand to stop bike
- Use gps inReach app to send preset "start of break" message.
- Remove gloves and place behind widscreen or ontop of throttle/right bar grip
- Remove helmet and place on right mirror (covering gloves, visor down if rain possible)
- Turn off and remove bike key, place in jacket lower right side pocket.
- Take hat from jacket lower left top pocket and cover wild hair.
- Remove and turnoff gps, slip into jacket lower left top "hat" pocket
- Remove earplugs & cardo, add to jacket lower right side pocket.
- Remove water bladder and slip over left bar grip
- Dismount bike then remove overpants and place over seat.
- Locate the bathroom ...
For an emergency bathroom stop, I can skip lunch step: #2, and be mobile after step #5. Better to have wild hair than wet pants. Step 6 "hatting of the wild hair" can be completed on the move.
With only my jacket items, I can blog at any break using the keyboard from the rabbit pouch, smart phone, and magsafe battery pack as a phone stand. I blog locally on an Android app called Writer Lite. Later when I have connectivity I cut & paste that text to the website. Sometimes I even proof read it first... If my website is down I can ssh into the cloud host using the same phone and keyboard to fix it. On early tours I kept the keyboard in my topcase, and sometimes had to go back to the bike to get it. I purchased a chromebook for this, but descovered the phone and keyboard was sufficient for my needs.
Water bladder

- water 1.5L
- sun block
- Toilet Paper (TP)
- glasses
- lighter
- head bug net
- para cord (~ 4 arm spans)
- misc trash & temp storage
The bladder enables me to keep hydrated on long trips. Taking a mouthfull when my lips get dry seems to be a good balance point between dehydration and frequently needing to pee. Effectively I'm trying to transfer from the water bladder into the urin bladder at approximatly my evaporation rate. Evaporation occures quickly with a constant airflow from riding. Eye drops and lip balm are indicators of this. More water intake means less lip balm and eye drop use. Too much water means I having to stop to pee more.
Bladder water is also poured into my pan to boil for morning coffee. When possible I refill the bladder from free campground our drinking fountain sources. Often I will buy a larger (or extra) water and strap the extra container under the cargo net on the pillion seat. Extra water seems to hold in place really well under the cargo net if an elastic web strand is wrapped once around the bottle's neck.
Water is also used to wet down a bandana when >85F. Cold water feels good, but any water works. Bathroom sink water, stream water or any drinking sources works. The wet bandana rolled and tied around my neck activates my "swamp cooler AC". The AC effect feels like a 10-15F lower temperature. Making 95F tolerable to this New Englander. I've tried the fancy wet bead tubes, but didn't like the 12 hours it takes to dry them out. The swollen damp tube then needs to be stored someplace. The simple cotton bandana is nearly dry every 30-45 minutes. Every 45 minutes you have the opportunity to "recharge the AC". Normally AC is only needed in early afternoon heat, so one or two recharges is is enough. Very easy to store when dry, and has many other uses. Once dry it's easy to forget about until you finally stop, then just fold and stash the nice dry cloth. I carry more than one and wash used items with my clothing once a week.
Since the bladder often goes on hikes with me I store some emergency items here too. A knife and compass would be great additions, but I worry about having a knife in something I may forget to take off my back. I would hate to be stopped entering someplace, have my bag checked, and weapon discovered. A light jacket can be passed through the arm straps and let hang down as lumbar support. Nice way to carry a warm layer, without having to wear it while hiking.
( to be continued as parts: "on bike" & "when touring")